

What I Learned From Sharing Native File Dialogs
Thu 27 November 2014
Michael Labbe
#code
I open sourced Native File Dialog last night. It’s a lean C library that pops up a native file dialog on Linux, Mac and Windows. It seems to have scratched an itch that a lot of people have, as it’s been starred 50 times on Github overnight, and my announcement tweet has received 27 retweets and 52 favorites as of this morning.
I did learn a few things writing and releasing this. Here they are in no particular order.
Linux users are reticent to link against GTK+. Plenty of people don’t want the overhead of GTK+ just to get a few paths back from the user. This makes sense if your app benefits from staying small. In order to get GTK+ up, you have to link against quite a few libraries: Cairo, GLib and GTK+ itself, to name three.
Interestingly, there must be similar overhead in Windows, but it isn’t as visible; most of what you need is given to you through COM object initialization, not linking libraries. Linux has no official toolkit, and as a result, the cost is much more visible to developers.
Of course, you can release COM objects.
GTK+ has no uninitialization. Once you have paid the cost of initializing GTK+, it permanently allocates private memory in your process. This is a shame. At least I can release COM objects.
This has led people to suggest Zenity and pipes; actually launching the file dialog in a separate process! I have always been skeptical of this approach — what happens when the dialog opens in another workspace, or the main app crashes, or X remoting causes other idiosyncrasies?
At any rate, I would be happy to accept an nfd_zenity.c patch which allows people to trade off between these problems.
People Really Like to just add one file to their project. Native File Dialog builds with SCons, which, admittedly, is not something every developer has installed. STB has spoiled people — they really want to just drop a file in to their current build! I am going to provide instructions that help people bypass SCons.
Feedback is hard to come by when you work on a small team. If you open source something useful, devs will scrutinize it and provide feedback. It doesn’t have to be a large piece of code — actually, it’s probably better that it’s not! If NFD did ten things, the issues people raised would have been broader, and the criticisms received may not have been as beneficial to me.
Installing an Air Conditioner in a Window That Barely Opens
Mon 26 May 2014
Michael Labbe
#handy
Around here, air conditioning is almost never part of a deal when you buy or rent an apartment. I converted a spare bedroom into an office, which was great until the sun hit and it turned into a virtual sauna.
In getting an AC unit installed, I was faced with an interesting problem: I had windows that opened up and out at an angle, but just barely. The glass is held in place by metal framing, making it intractable to drill through.
I contacted a few self-described handymen who quoted me anywhere from 50 to 500 dollars and proposed building mounts out of wood, metal, or just plain crazy gluing the AC unit to the frame (!). No two quotes proposed the same solution. That’s when I knew the experience I could hire to solve the problem would be improvising on the job. I had an idea of my own which was cheap and easy to test, so I decided to try it out.
The approach? Industrial strength Velcro® and acrylic glass.
I recently had success mounting rear speakers on stands with Velcro. This isn’t the stuff you kept your shoes on with in second grade. Industrial strength Velcro is at least two inches wide and comes in rolls measured by the foot. The rear side has very sticky glue and can easily attach to the metal frame of your window.
Here’s the finished product, with instructions below:

The total cost was under $40, took two hours, and has worked for me for two summers. I can remove the acrylic glass by tearing away at the Velcro in seconds, making end-of-season take down a five minute chore.
Here is what you need:
- One sheet of acrylic glass — large enough to cover the entire open window.
- Industrial Velcro to run up the sides of the window. The wider, the better. More on this later.
- A circular saw to cut the acrylic glass, or if you’re like me and don’t have a workbench, a scouring knife and some personal tenacity.
- A floor AC unit. Window mounted ones will not work, as they need to hang out too far and will interfere with your barely-opening window.
Step One
Mount the plastic exhaust panel on your window. Your AC panel instructions will tell you to screw it into the wall. This is intractable — we want to avoid damaging our windows by drilling into metal. Instead, throw down a few inches of that sweet, sweet Velcro and the exhaust panel stays in place:

Step Two
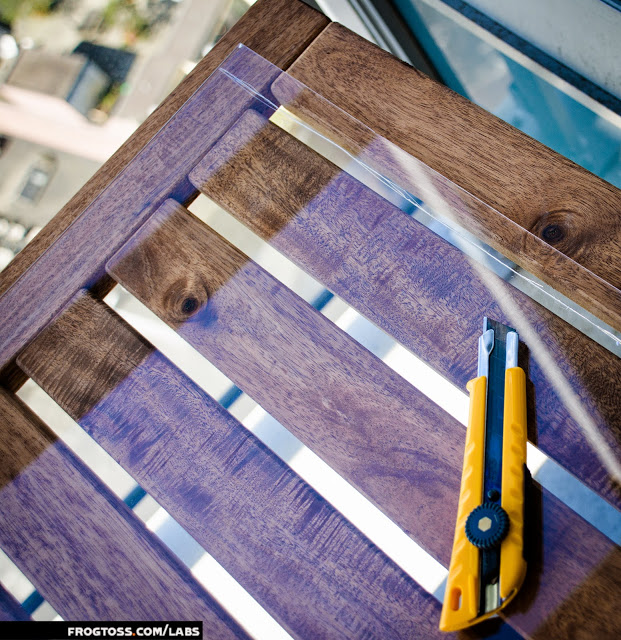
Measure your window and cut the acrylic glass to fit.
Unfortunately, I didn’t have a workbench, and didn’t feel like making my way to the ‘burbs to use one, so I used a table on my deck. I scoured the glass with a scouring knife and filed the edges down. This was not easy, and I was punished for my laziness and impatience by grinding away for almost an hour.
The glass:

The scouring:
Step Three
Now that your acrylic glass is cut to fit and filed down for smoothness, attach Velcro to the edges and mount it in the window. You want it to fit in so that it is overlapping the metal frame on the top and sides, with the bottom seating directly into the AC exhaust mount.
Here’s a closeup of Velcro mounted to the metal window edge:

Bonus Tips
At this point, you can fire up the AC and breathe again, but you should keep these tips in mind:
- If you have a wide enough window, consider getting an AC unit that draws its air from outside instead of from in your house. AC units with two pipes are always going to produce a colder room than one. Otherwise, you are drawing warm air from the rest of your apartment when your AC creates a vacuum by expelling the hot air you are aiming to remove from your room.
- You want your Velcro to be as wide as possible. When the sun hits the metal frame, it heats up and some of the glue will melt. If you’ve done your job, you should have a very firm and sturdy acrylic frame, but after a couple of years, the glue will be tired and you will need to replace the Velcro.
- Seriously, scouring acrylic with a knife is a pain. Get a table saw.
Patterns for Multiplayer Game Variety
Mon 28 April 2014
Michael Labbe
#code
Game Rules
So you’ve made a super fun multiplayer game and you want to expand it by adding game modes, tweaks and so forth. Here are some possible do’s and don’ts that allow for rapid expansion and moddability.
The approach of branching your game logic by game modes makes your code unexpandable. Consider:
if ( gamemode == MODE_DEATHMATCH ) { DisplayFreeForAllScoreboard();} else if ( gamemode == MODE_CTF || gamemode == MODE_TEAMDM ) { DisplayTeamScoreboard();}This works with a finite number of game modes, but it makes modding hard. It also makes expanding the number of game modes difficult. A better approach is to create an abstract game rules base class which is derived for each game mode.
class IGameRules{public: virtual int GetTeamCount( void ) const = 0;};class GameRulesDeathmatch : public IGameRules{public: int GetTeamCount( void ) const { return 1; }};class GameRulesCTF : public IGameRules{public: int GetTeamCount( void ) const { return 2; }};Now you can simply write the game logic as:
if ( gamemode.GetTeamCount() == 1 ) { DisplayFreeForAllScoreboard();} else if ( gamemode.GetTeamCount() == 2 ) { DisplayTeamScoreboard();}This approach lets you easily extend your game code to new game mode variants by simply deriving from the IGameRules hierarchy.
Modifiers
Unreal gets credit for being the first game to use modifiers. Modifiers are tweaks to tuning values — they are not holistic mods. This lets the player apply, for example, low gravity and instagib at the same time, by selecting two different mods. (Thereby ruining my vanilla experience, grr…)
This is pretty simple: apply modifiers from top-to-bottom order. Call out conflicts. Unreal did modifier selection with a complete UI in the late 90s.
Combine the Two
Consider exposing game rules methods as modifier tunable values. For example, if you have a game rule bool IsElimination(), which causes players to not respawn after they die, exposing this as a modifier value will allow a modder to go in and take an existing game mode, say, Team DM, and turn it into an elimination mode. Boom! A modder just recreated a simple Clan Arena mode with a text file and no need to learn a scripting language.